Site Guide
Jump to
Stay up to date or ask questions on the Squarespace Forum
For guidance, look at Squarespace Help Center
Naming: Use hyphens, not underscores, to separate words. Google identifies hyphens as word separators, thereby helping it understand what the page is about.
STRUCTURE
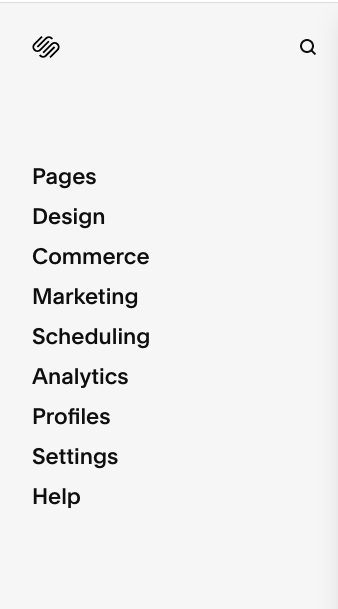


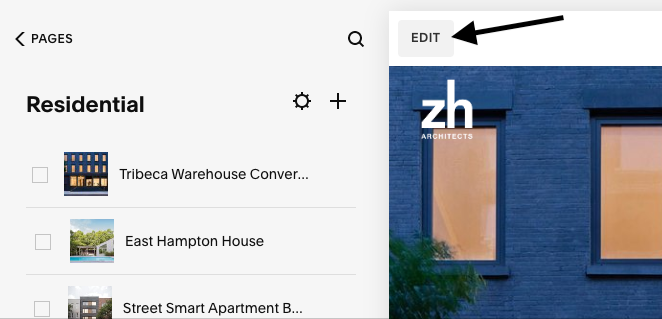
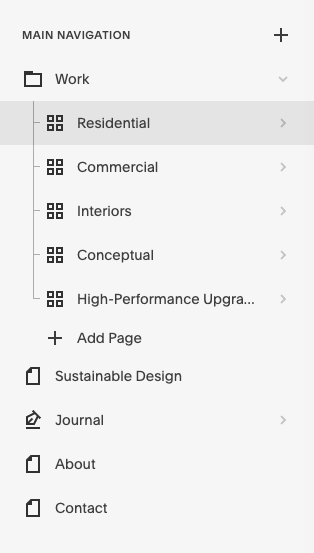
To edit or add to your site, click on “Pages”. They are organized in two sections: “Main Navigation” and “Not Linked”.
Main Navigation - visibly appears as part of the site’s main navigation
Not Linked - is publicly-accessible, visible, can appear in search results, and is linkable, but does not appear in the nav.
Click “Pages”
Your site is comprised of the pages below.
Anything with an arrow has subsequent pages within it. (Ex. Work, Residential, Journal)
GROUPED PAGES - cannot be duplicated
Portfolio - A collection of projects, each with their own page. The portfolio page is like an index or table of contents for the projects.

Blog - A collection of blog posts, each post is a page. The blog page is like an index or table of contents for the posts.
Folder - when used in the Main Navigation, the folder will appear as a main nav item and contains linkable pages
WHAT CAN BE DUPLICATED
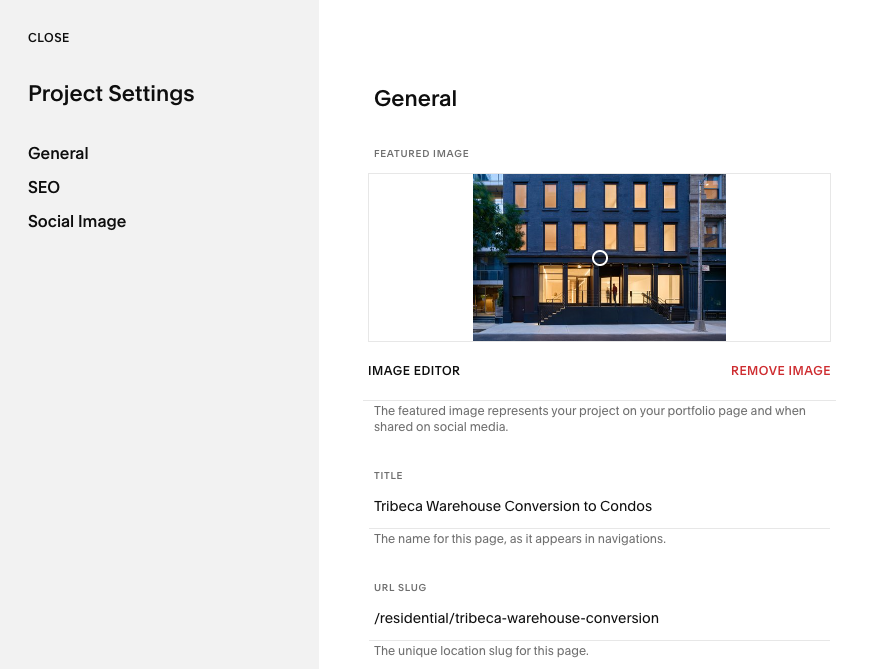
Individual pages (by going into “Settings”):
Project page
Blog post
Single page (Sustainable Design, About, Contact, Bio Page)
Elements, look for this icon:
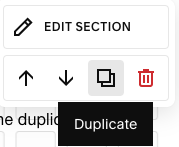
Sections (hover)
Any blocks on a page: image, text, video (click)

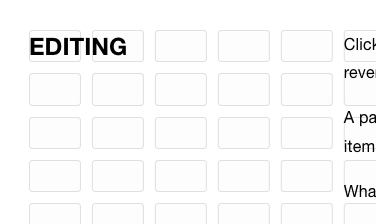
EDITING

Click “Edit” to change items on a page. When you are done editing, click “Done” + “Save”, or to revert and undo the changes you just made, click “Discard Changes”.
A page item will highlight when your mouse is hovered over it. Sometimes edit options will appear, sometimes you need to double click on an item for edit options to appear.
What you can change:
Text (Name credits and tags have been listed alphabetically)
Images
Layout
Sizes
When you are in Edit mode, pressing”G” will show the page’s grid.
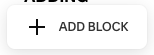
ADDING
Add an Item
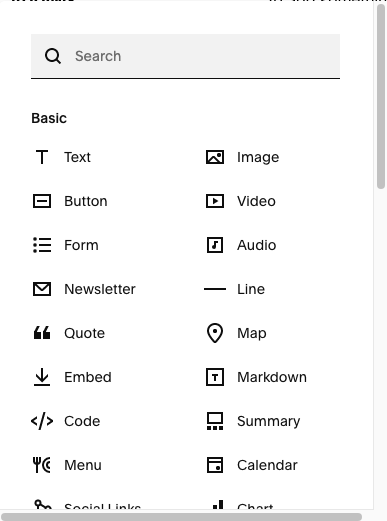
Hover over the section you want to add something to, and click “+ Add Block”. You can these items:
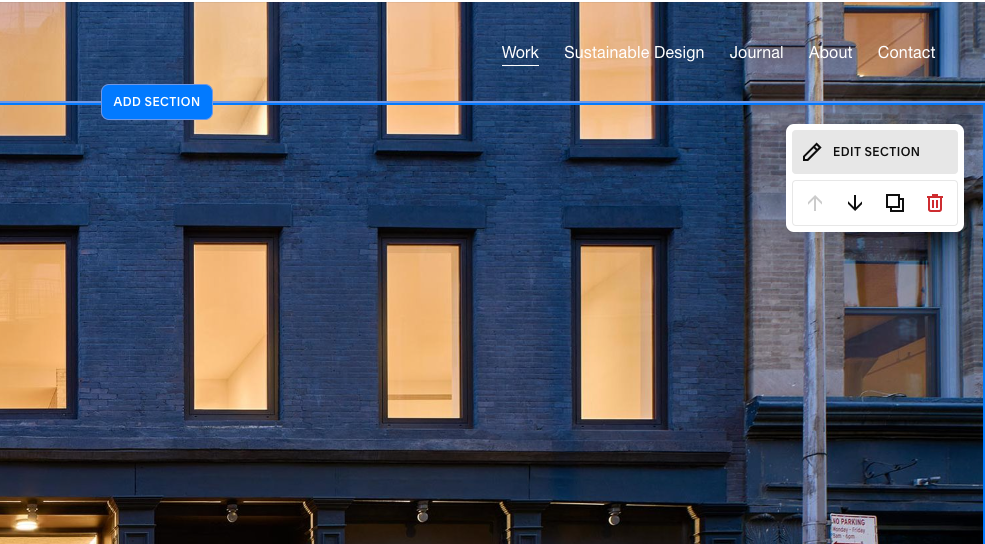
Add a Section
Hover over a section and click add section. A new section will populate above or below it. You could also duplicate a section instead and edit the duplicated one.

SECTIONS
COMING SOON
You can save/favorite any section like a library, and add it anywhere to any page.
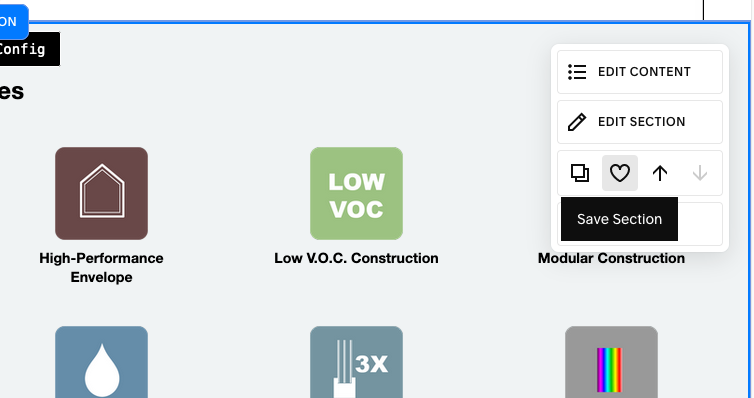
2/ On the page you want to add it to, click “Add Section”> “Saved Sections” > select what you want to add.
1/ When in edit mode on a page, hover over the section you want to save. Click the heart icon.
TEXT

Text Styles
There are different preset styles you can choose from:
Heading 1
Heading 2
Heading 3
Heading 4
Paragraph 1 Paragraph 1
Paragraph 2 Paragraph 2
Paragraph 3 Paragraph 3
Paragraph Break
Looks like this. And is achieved by hitting “Return” on your keyboard.
Line Break
Looks like this. And is achieved by hitting “Shift” + “Return” on your keyboard.
For Blog pages
You can use any wording, but keep it limited to a maximum of 5 for the whole Journal.
FILTERS
For Conceptual:
Competition
Cultural
For Residential:
Affordable Housing
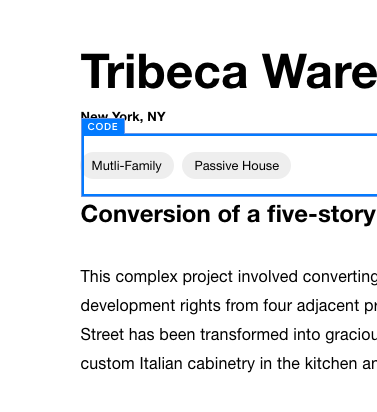
Multi-Family
Passive House
Single-Family
How to edit/add

Click this bottom-left icon to see the full text

Change these areas to the tag you choose. Make sure the closing </a>’s and </p> are there
PROJECT PAGES
BLOG PAGES
For Project pages
In order to include filter tags on this type of page, a work-around has been used, so editing tags here is a bit different and limited to the ones below.
Edits are made on a Project page. You do not need to edit the tags on the Portfolio index page.
How to edit/add
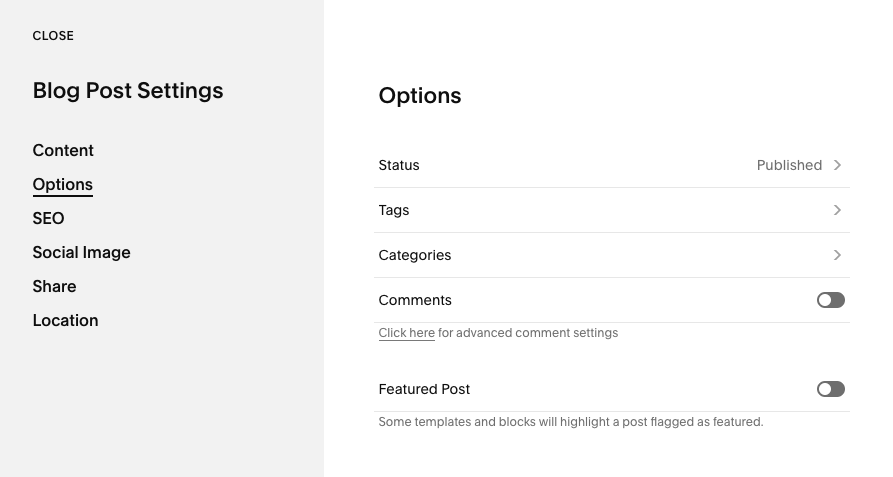
1. Go the settings of the Blog Post
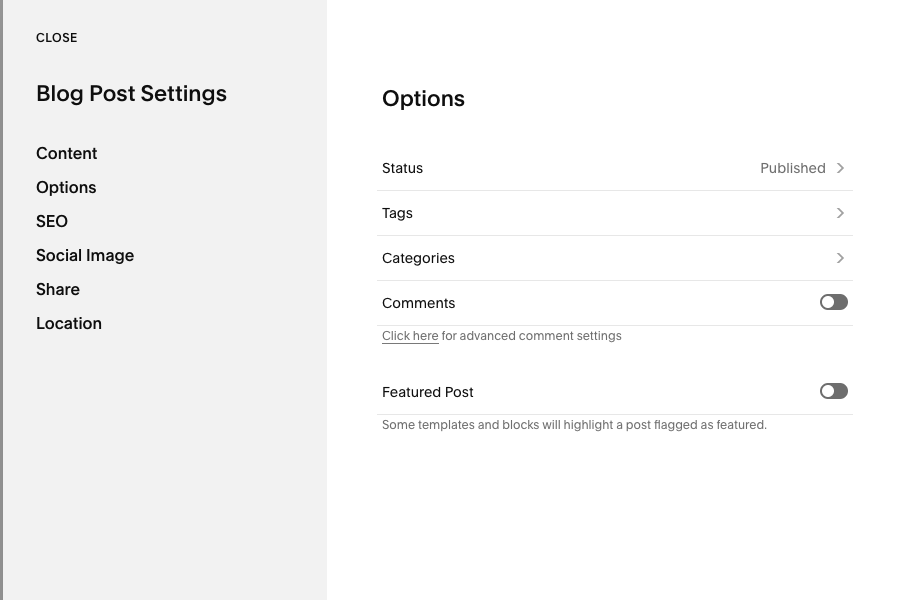

These appear on Project Pages and in Journal.
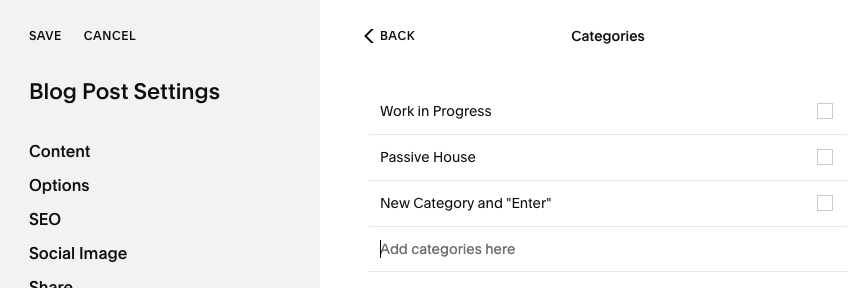
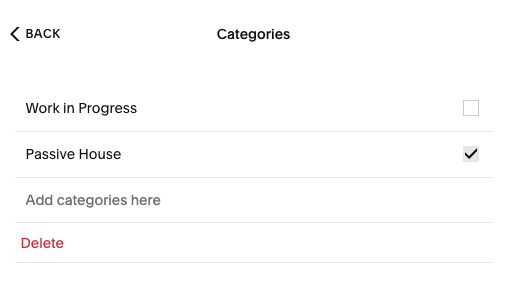
2. Click on “Options”, then “Categories”
3. Add or delete any Categories, and then make sure to Save. To add a catgeory, type the words and then press “Enter”.
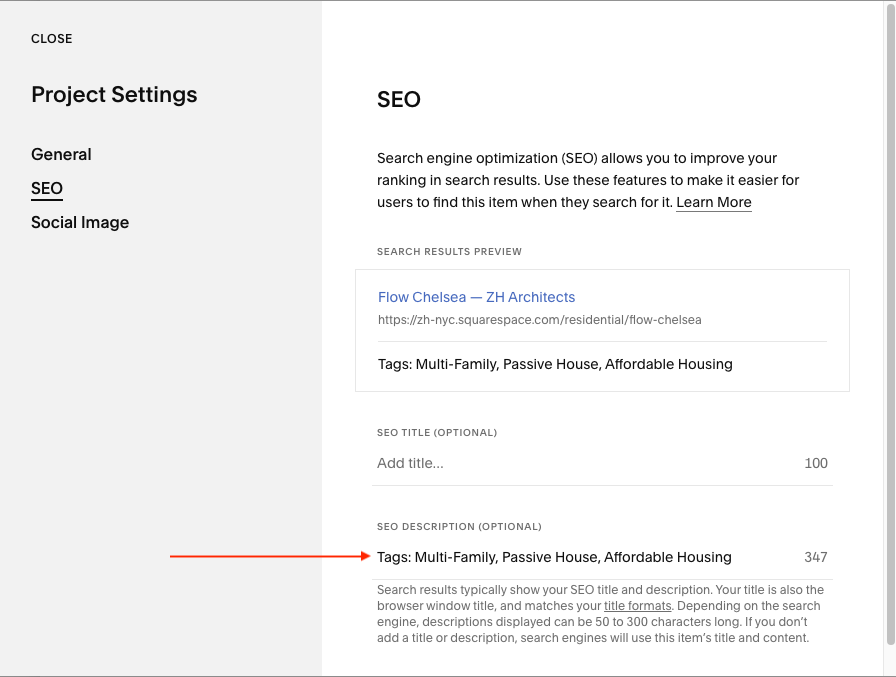
2. In project page Settings, click on SEO, and in SEO Description, update the tags to the same ones that are in the code on the project page.
Must be written the same way, with multiple tags separated by a comma:
Tags: X
Tags: X, X, X
IMAGES: FORMATTING
It’s important to optimize your images before uploading to a website, as large file size can effect how fast or slow your site loads. The goal is the smallest file size possible without sacrificing quality. Avoid screenshots of video, if possible. Squarespace automatically creates different size versions of every image. The height changes relative to the width to preserve the image's shape. Squarespace's built-in responsive design automatically chooses the appropriate image size based on the visitor's screen.
For web optimization, you don’t need to crop or resize the width and height beforehand. This is done as follows.
FULL-SCREEN IMAGES
2500 pixels wide is ideal
Used on
Homepage: Carousel images
Projects: Hero (top) Image
ALL OTHER IMAGES
1000-1500 pixels wide
SIZING + SAVING
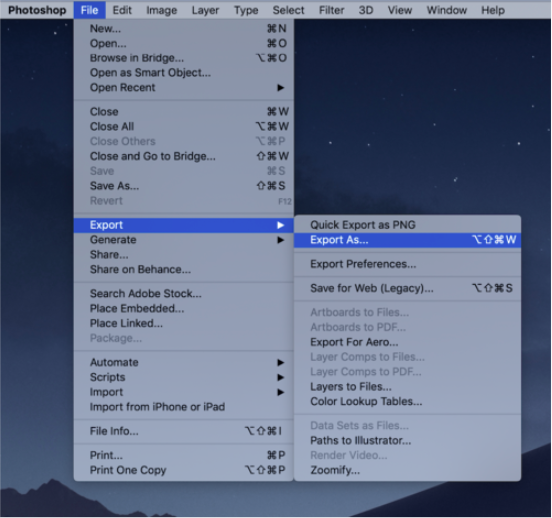
If you’re using the latest version of Photoshop CC, be sure to use their new export dialog under File > Export > Export As…
This usually outputs better results than using File > Export > Save for Web (Legacy), and definitely better than using File > Save As…
Source: Foreground Web
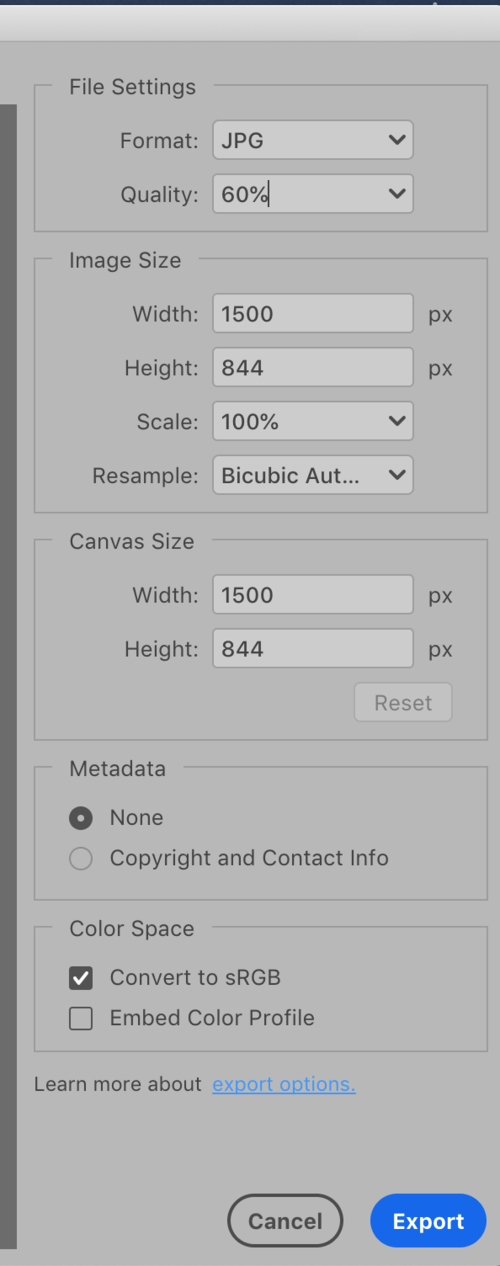
Enter the Image Size width, see Ideal Sizes (on the right)
50-70% Quality, eyeball and adjust to the quality that is acceptable to you
Use sRGB Color Space
Aim for image file size under 200k (max size 1 Mb)
Follow the naming convention
Save via “Export As”
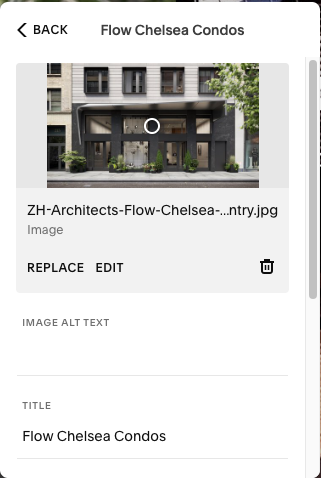
NAMING
A naming system helps keep things organized, understand, and helps when searching for images to replace. It can effect SEO (search engine optimization, aka google results).
Mirror the visible organization and hierarchy of your site. Use plain language that anyone can understand, separating words with a hyphen not an underscore. Only use letters, numbers, hyphens. No special characters or accented letters.
Naming examples for pages and url slugs.
ditmas-park-house
community-greenhouse
passive-house-all-sizes
Naming examples for image files
Examples:
Avso-Office-Hudson-Square.jpg
ZH-Upgrade-Soho-Greene-Sidewalk-After.jpg
IMAGES:
ADDING OR REMOVING
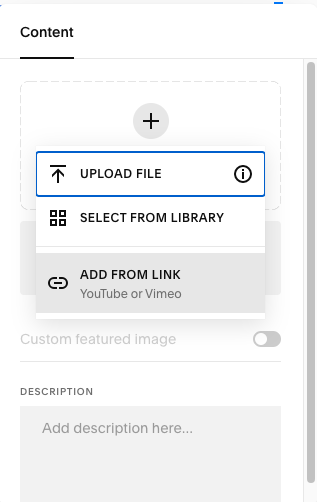
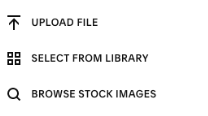
ADD or REMOVE IMAGE
Upload File/Images: Add a new image
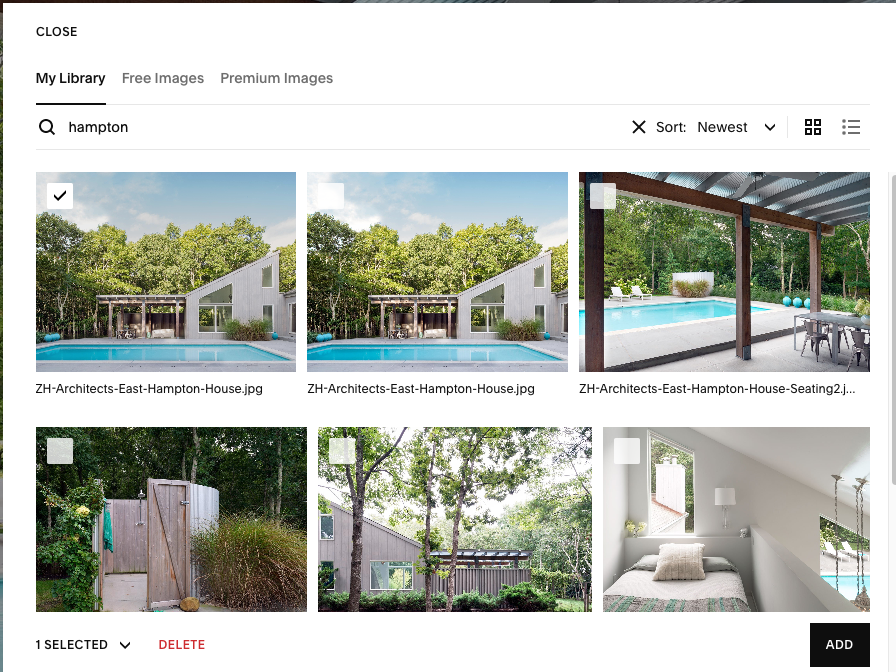
Select from Library/Search Images: Use an image that’s already been uploaded to the site. Squarespace keeps them in a library. A single image can be used in different instances, at differentt sizes and crops, without needing to resize or upload again for each instance.
This is when naming is useful. You can enter text to search for an exisitng file. Click on it and then press “Add”.
FOCAL POINT
Squarespace automatically resizes images and crops them depending on the layout and web browser size (desktop vs tablet vs mobile). The focal point (circle on the image) can be repositioned and any crops will be based on that center point.

IMAGES:
TYPES
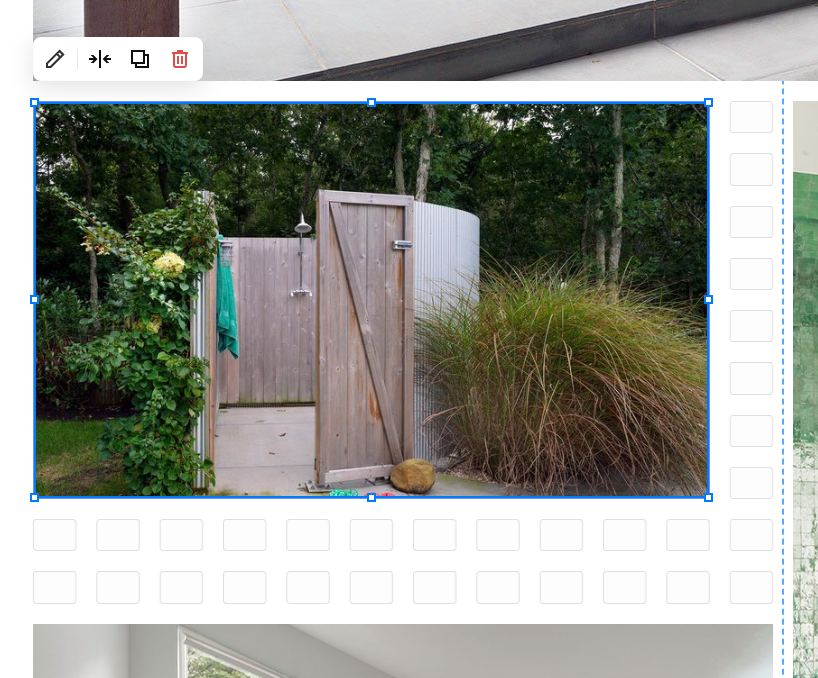
IMAGE BLOCK
These are exactly what they sound like. Move them around. Scale them by clicking and dragging on the handle points.
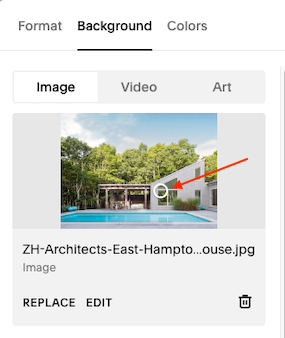
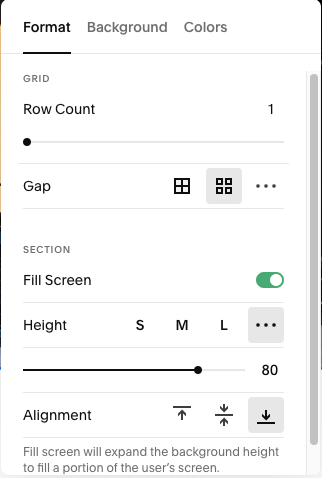
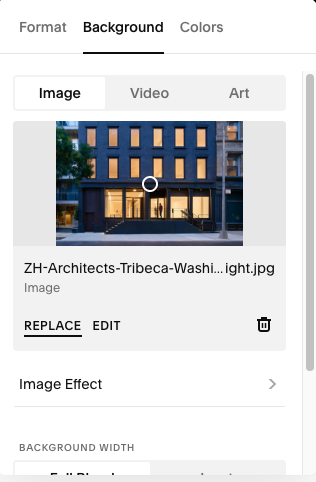
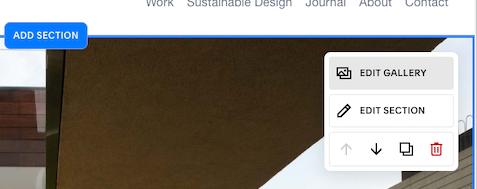
BACKGROUND IMAGE
These are the full-bleed hero images that sit at the top of the page, behind the site navigation as well.
1 Double click on the photo, then click “Edit Section”
2 Click on "the “Background” tab
3 Click “Replace”
Project page photos
Profile photos
Sustainable Design section photos
Project page hero (top) image
Sustainable Design hero image
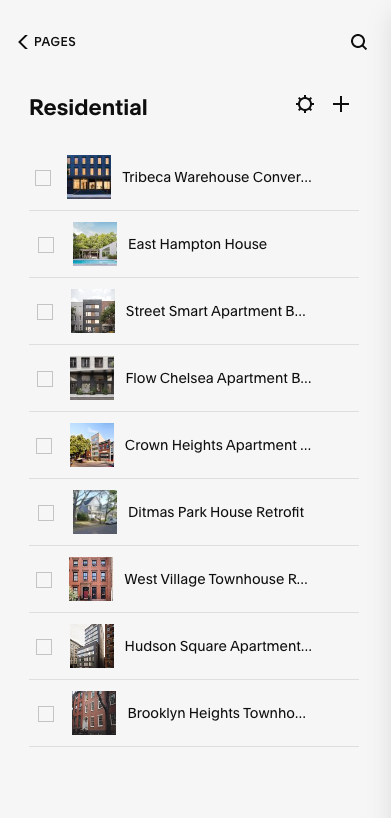
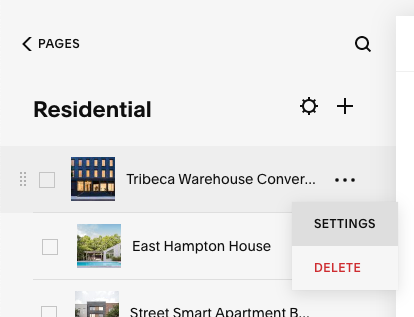
THUMBNAIL IMAGE
These thumbnails live on “Index” pages, like Work Category pages (such as Residential) and the Journal page, serving to represent the project or blog post, like a book cover.
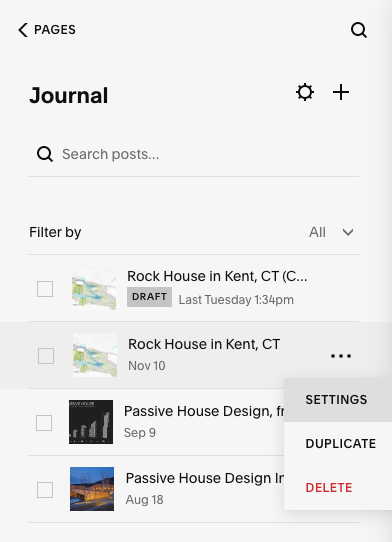
To edit, click on the Index where the page lives in (ex. Residential, Journal), then click the 3 dots and “Settings”, this will bring up a window where you can add, replace, or remove the image.
Project Category index
Journal index


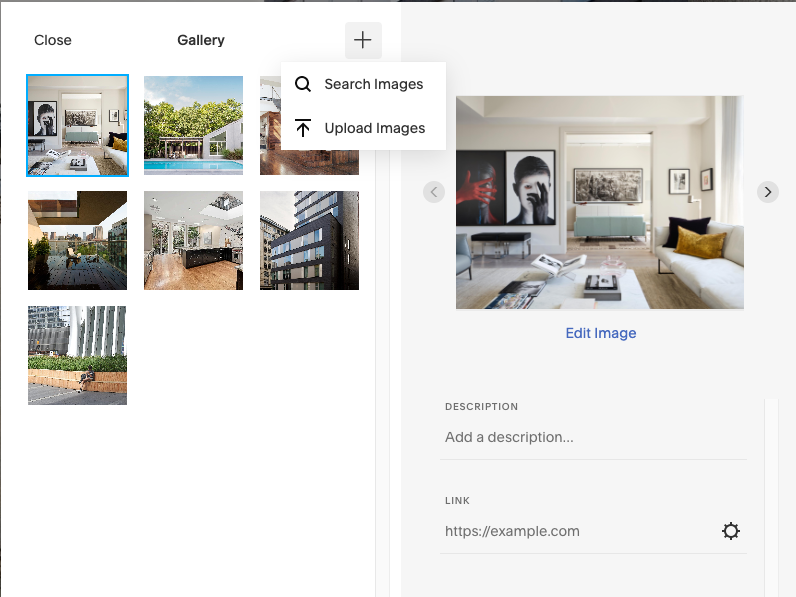
GALLERY SLIDESHOW
This lives solely on the top part of the homepage. It is the image carousel. Images can be replaced, removed, added, and rearranged in “Edit Gallery”. I suggest limiting it to 5-7 images, representing an overview of work you do.
Homepage hero carousel
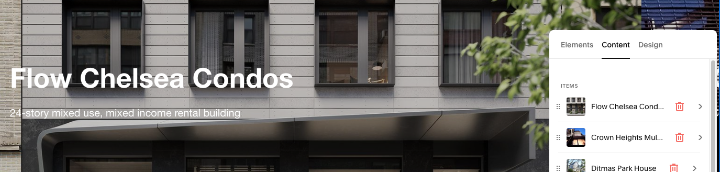
LIST: BANNER SLIDESHOW
This lives solely at the bottom of Sustainable Design. My suggestion is to limit it to 3-7 featured projects that give an idea of projects with a sustainable design focus. Hover over the image area > click the Content tab > click the project you want to edit, or add a new project.
Featured projects carousel on Sustainable Design
LISTS

LIST: SIMPLE LIST
This type of list organizes grouped items in columns automatically. They can have photos or only text. Display options include number of columns, titles, description, links.
Press
Project Credits
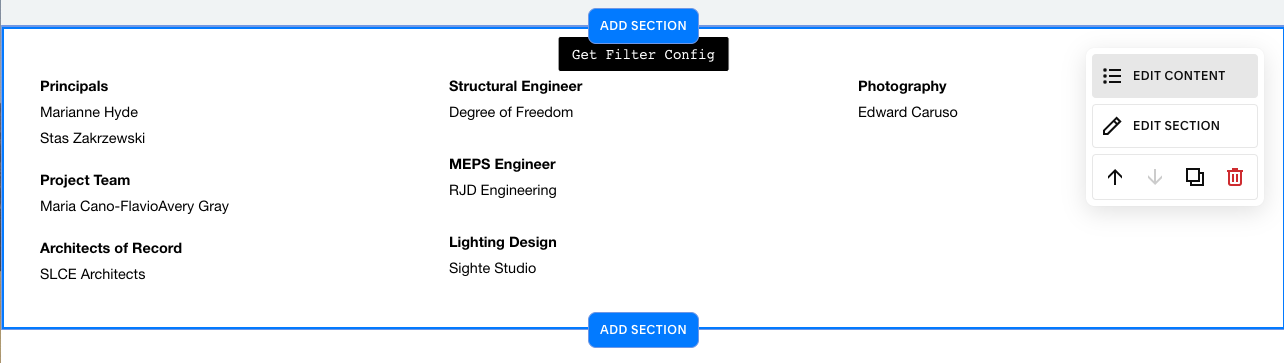


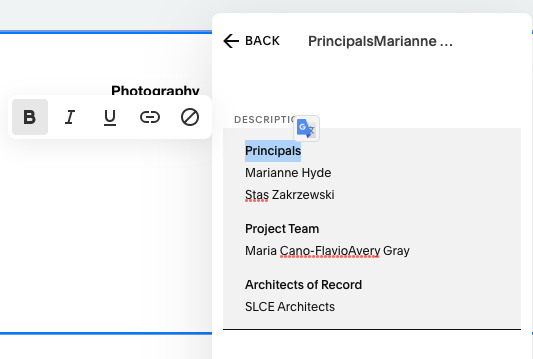
Project Credits
To edit, hover over the area > Edit Content. Only description is used here. With a mix of bold and regular type. And the line break command: “Shift+Return”

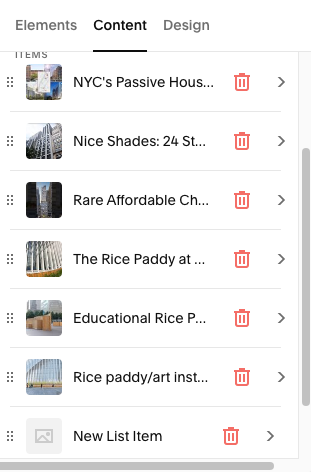
Press
To edit, hover over the area > Edit Content.
Display items in this list are: Image, Title, Description, and Button Text
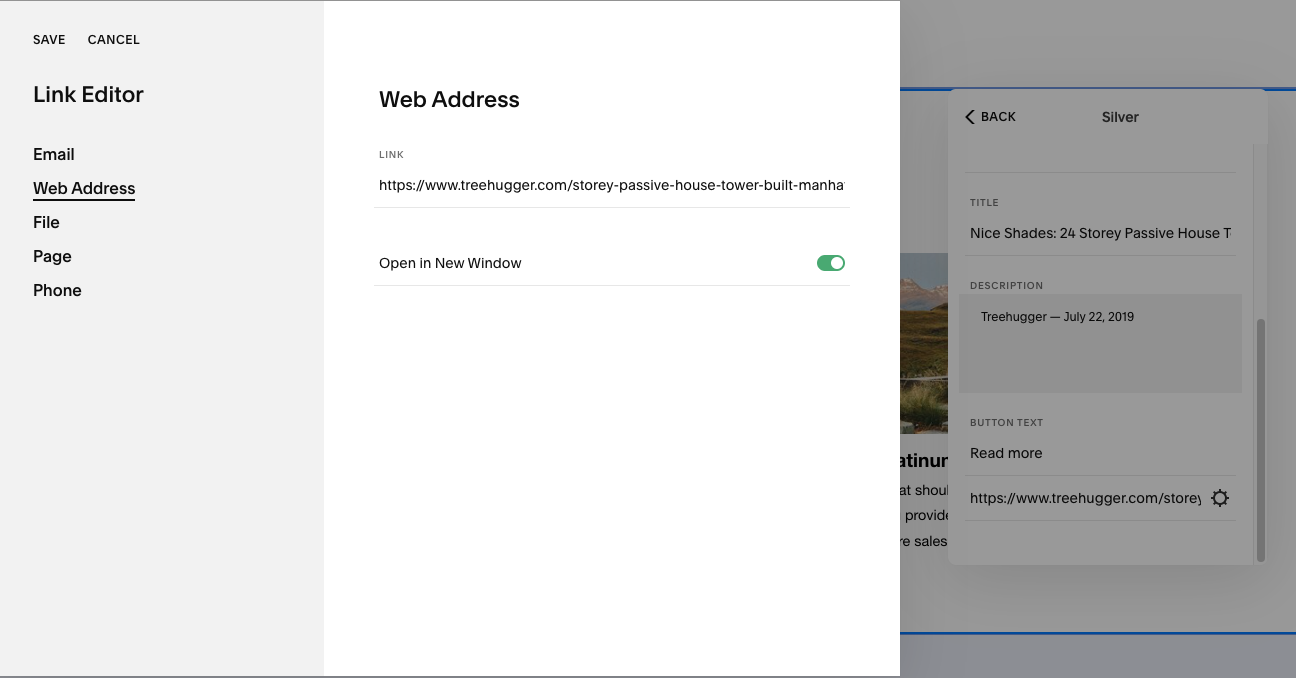
Linking
To link to an article, it’s better for the link to open a new window, so that your website stays open. To do this, click on the cog icon > click Web Address > enter the article link > click the toggle for “Open in New Window”, then click Save in the upper left corner.


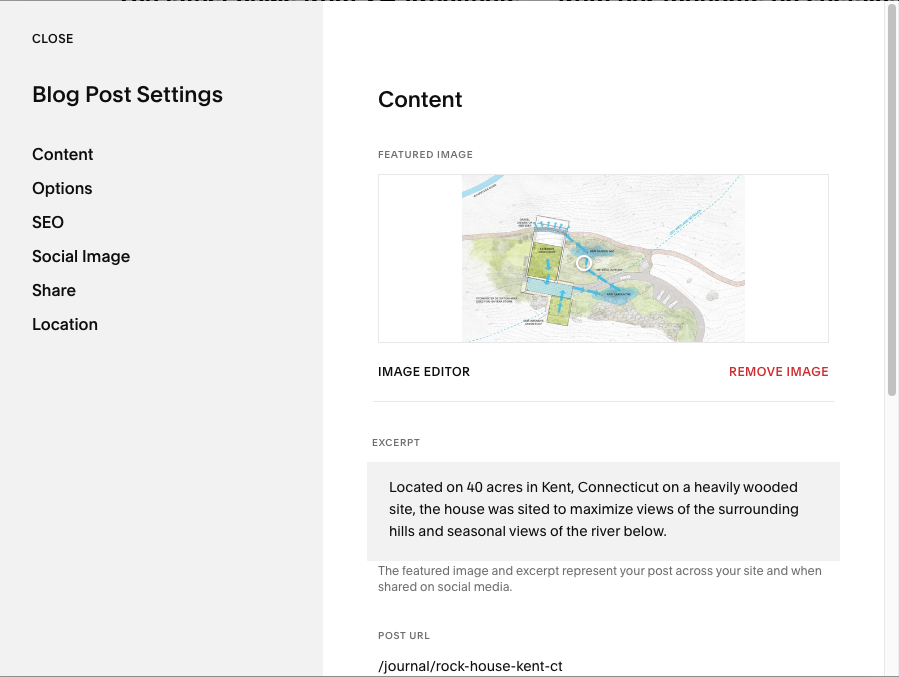
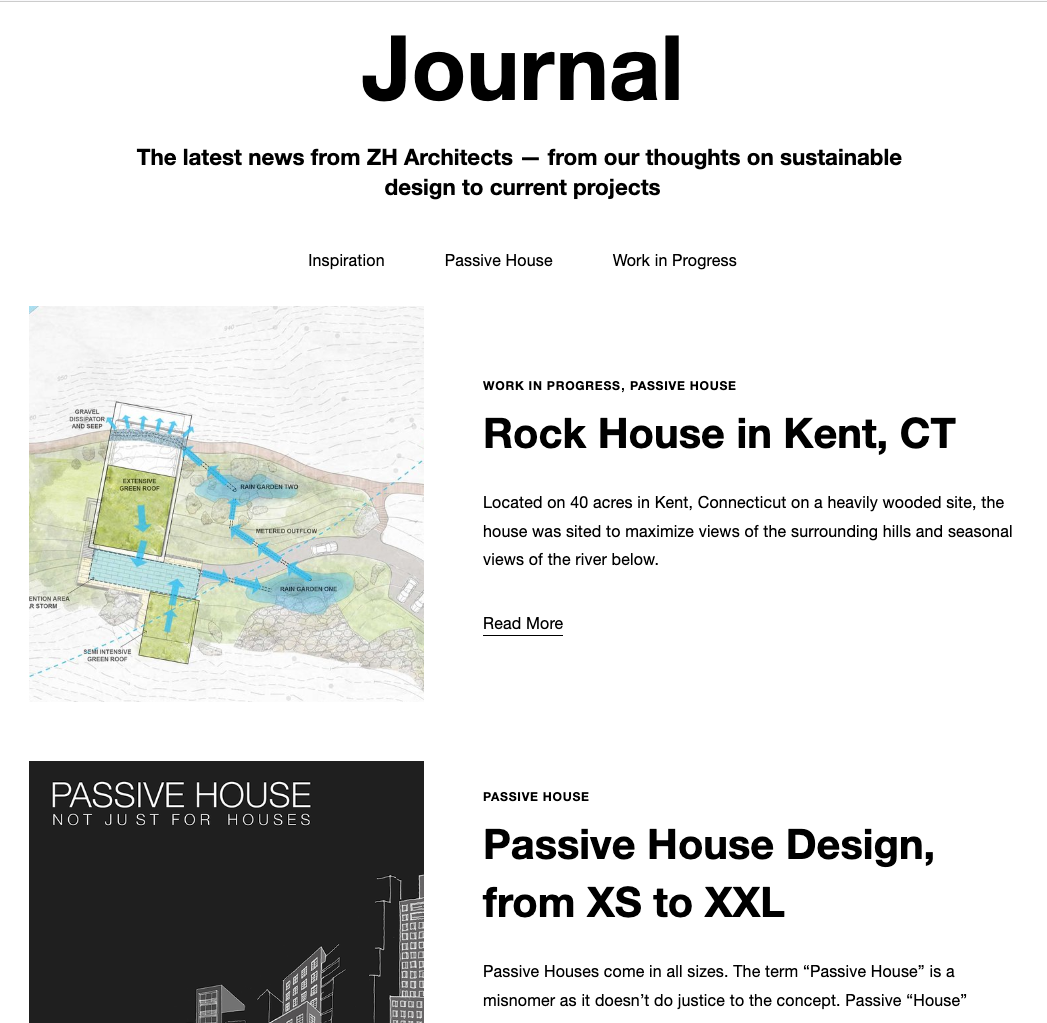
BLOG INDEX PAGE
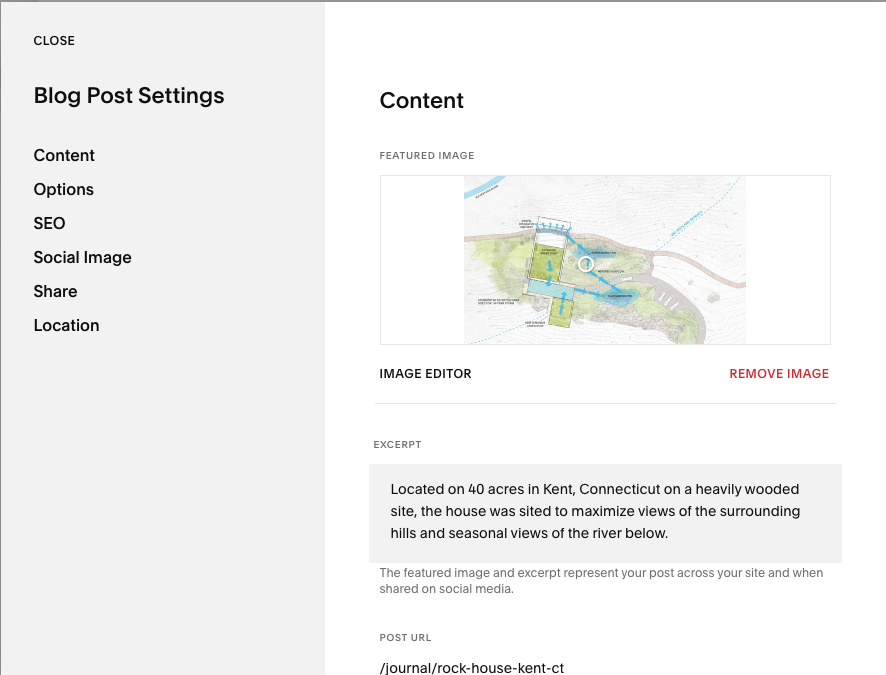
To edit the index info for each blog post, this must be done in each posts Settings. The blog post title gets populated automatically from the Blog post, so it cannot be edited in Settings.
Things to edit:
• Thumbnail image
• Excerpt blurb
• Categories (ex. Passive House, Work in Progress, Inspiration)
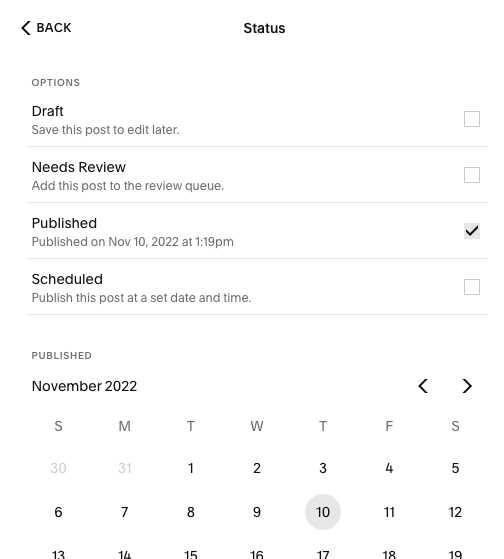
• Status (draft or published- change date to change the sequence)
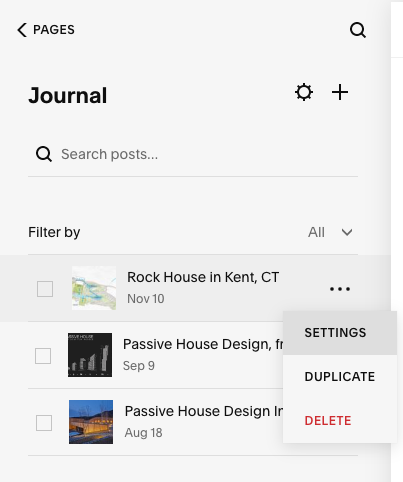
Edit what appears on the Journal page
For each Blog Post start with “Settings”
Content edits:
• Thumbnail image
• Excerpt blurb
Options edits:
• Catgeories — add or delete
• Published date to change sequence
VIDEO
To add a video block to the page
Hover over a section
Wait for “+ Add Block” to appear.
Click on that and then “Video”.


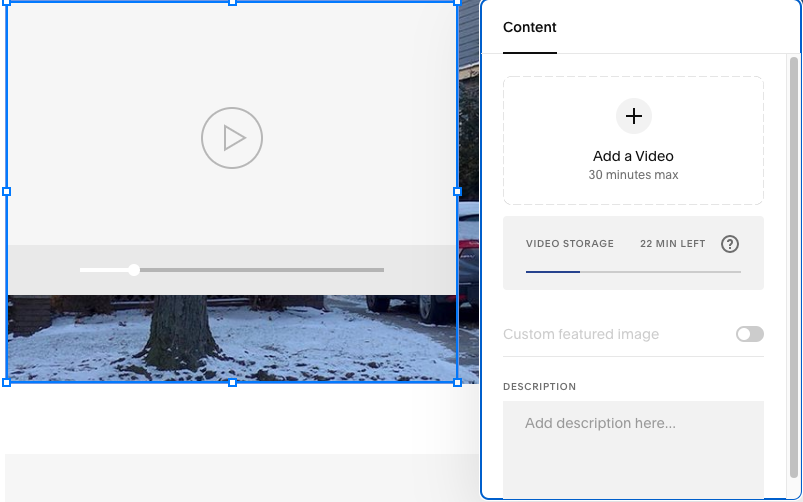
To add or change the video
Double-click the video box,
Click “add” or “replace” video.
Click “Add from link”